RefWorks
>>>How to select APA 7th Edition Citation Style in RefWorks
The University of New England provides students, staff, and faculty with free access to RefWorks, a fantastic tool for making style-correct citations. What follows is a quick, barebones tutorial on using RefWorks to generate citations. RefWorks has many other tools that are helpful for students doing any sort of research project. Please feel encouraged to play around with it to find out how it can best serve your needs! You can print these directions as well.
After you’re done with these directions, check out RefWorks’ own video instructions for more depth on the many ways you can use RefWorks for class.
Step 1 – Signing Up
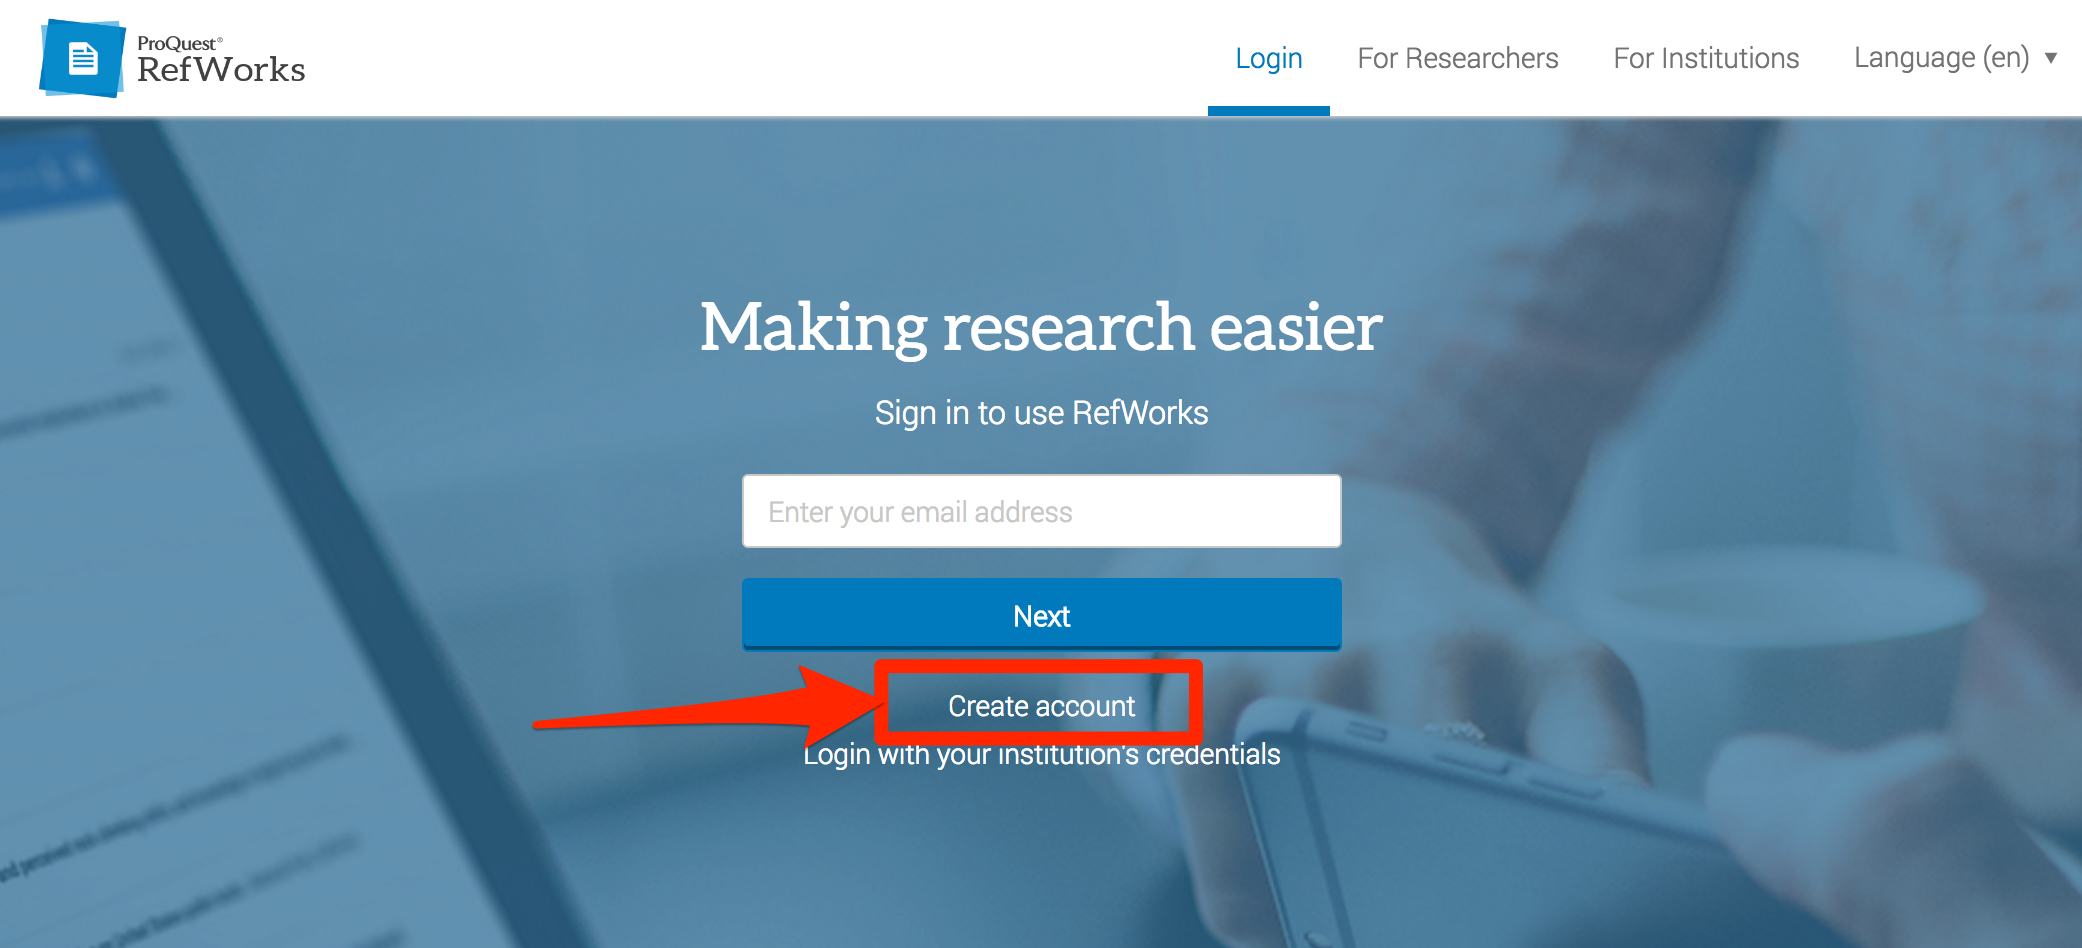
Signing up – Step Navigate to the RefWorks Website and click “Create Account.” You may be prompted to log into the UNE Library, which you can do using your @une.edu login credentials.
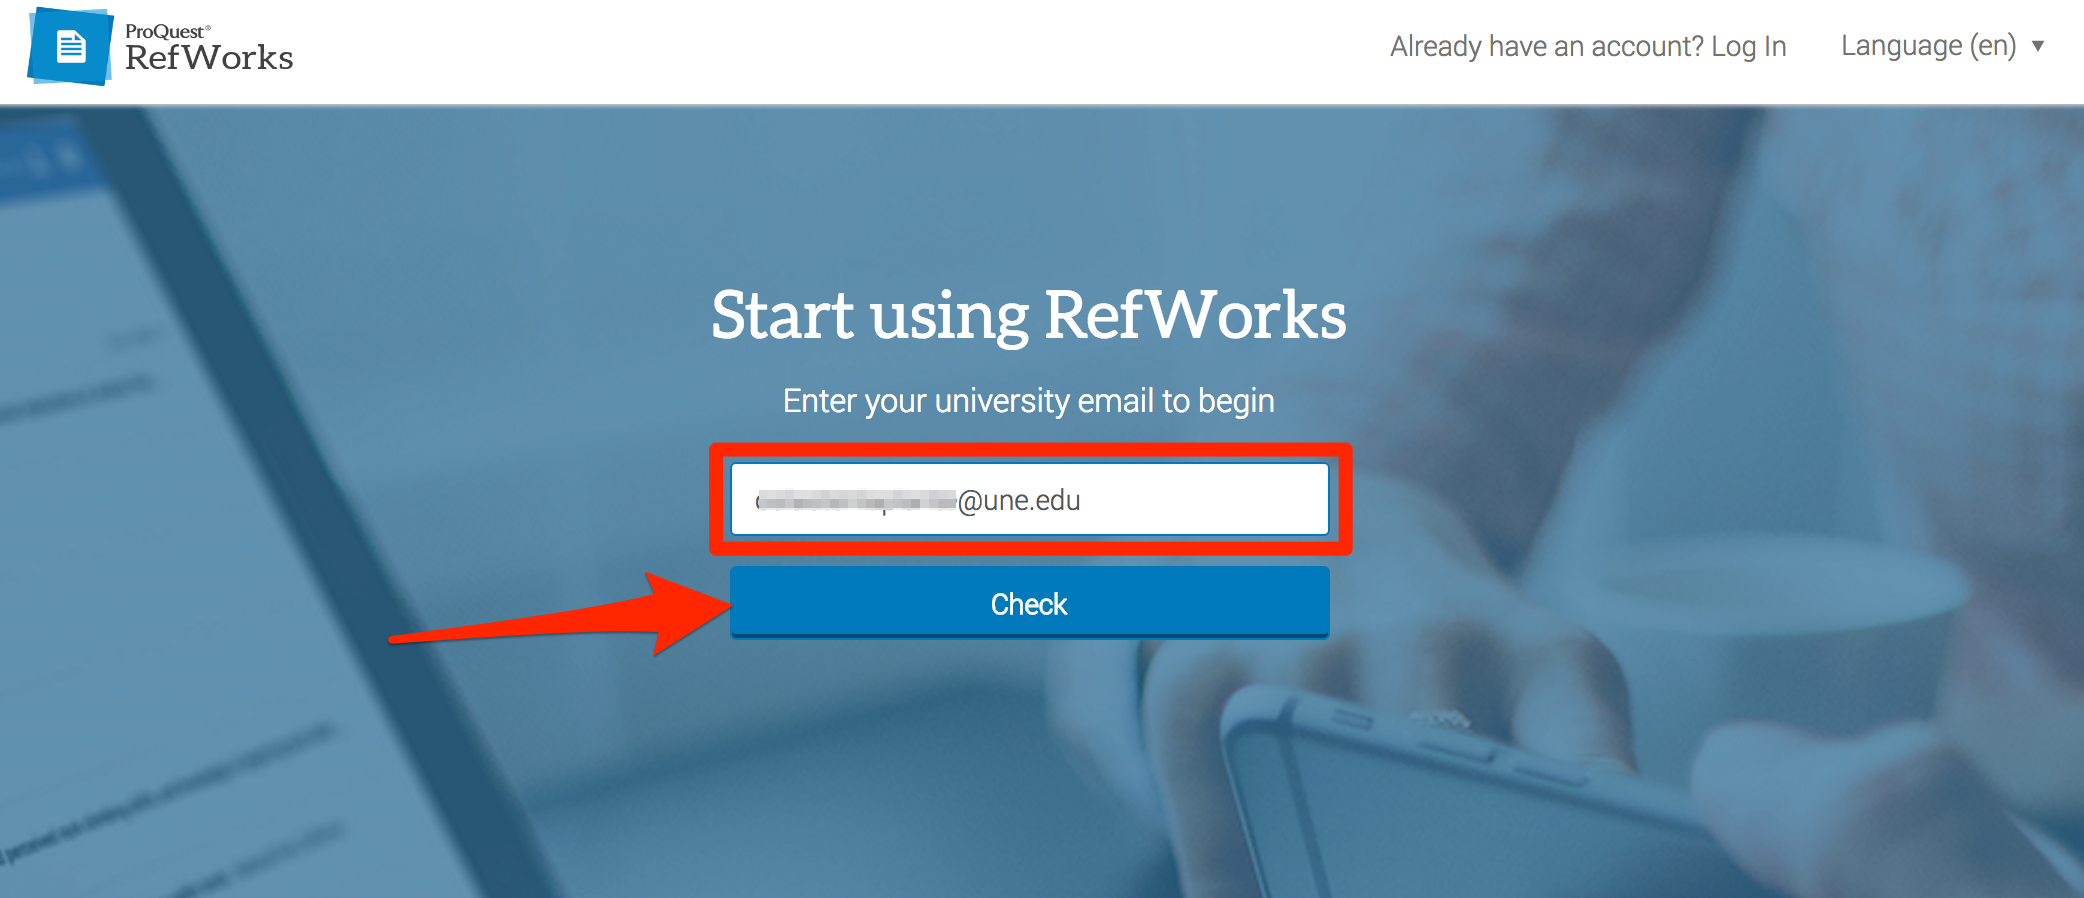
Then, enter your @une.edu University of New England email address and click “Check.”
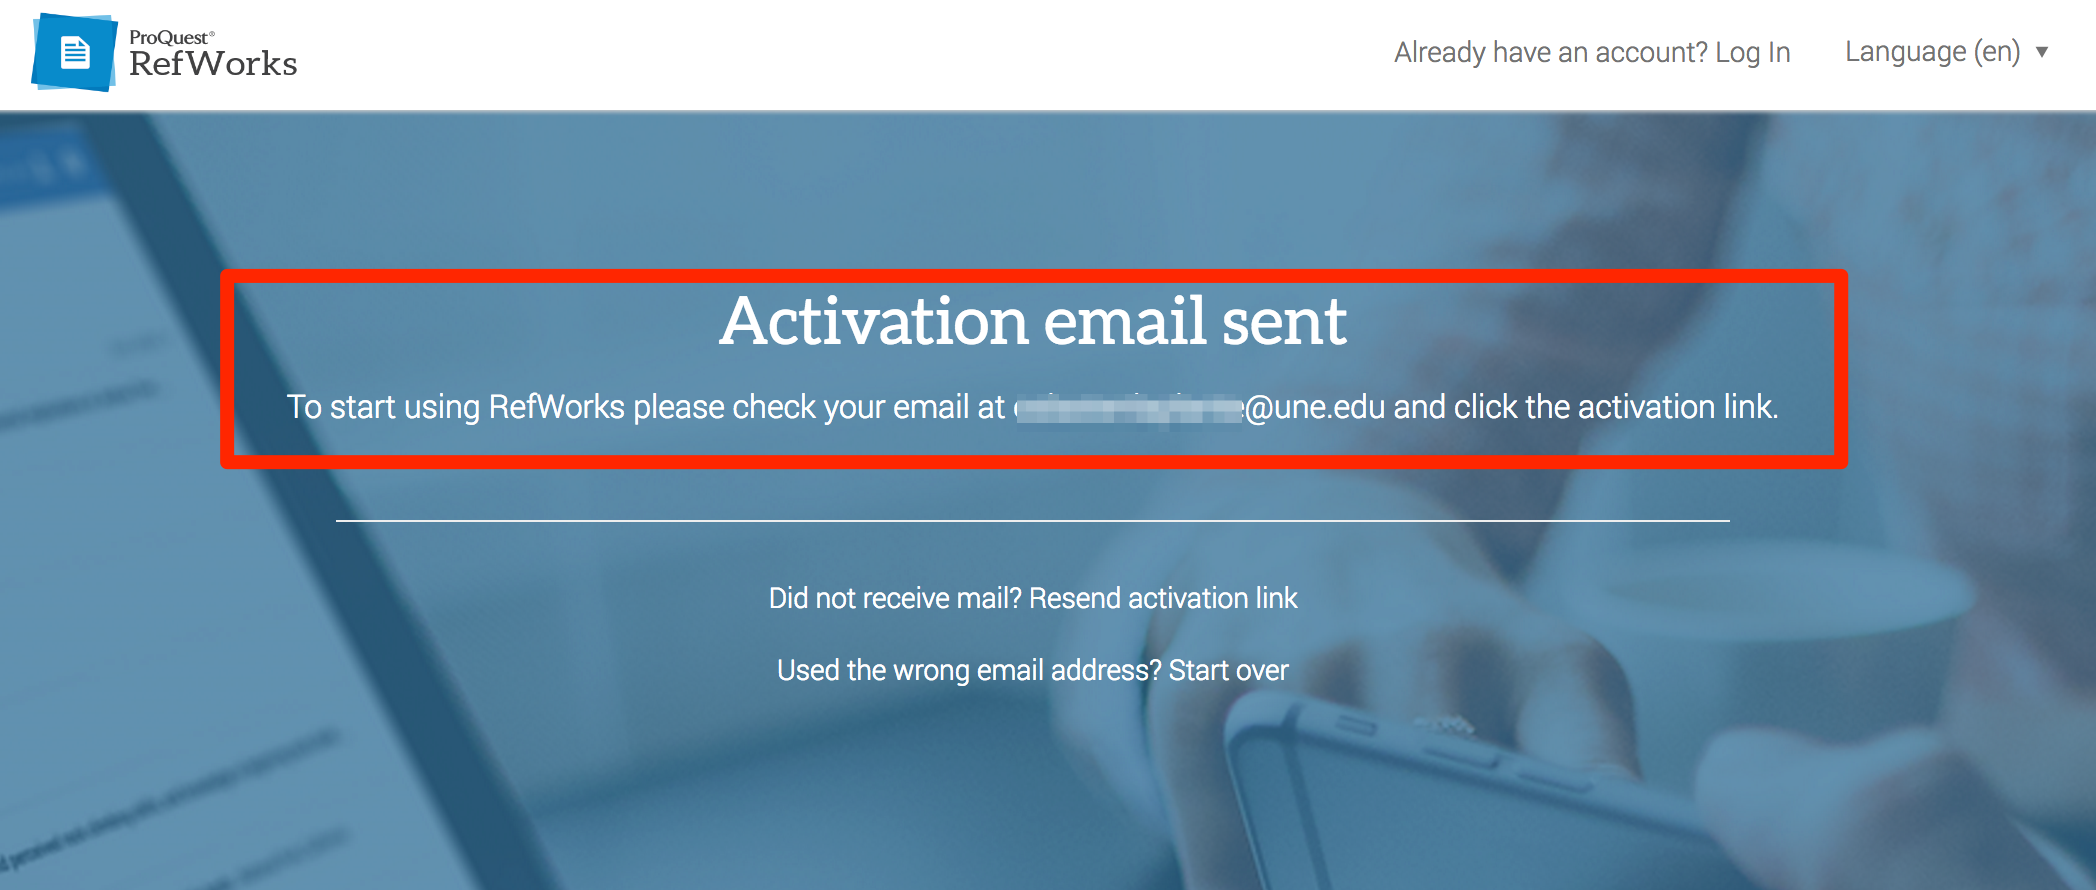
You’ll be sent an activation message via your @une.edu email account.
Locate the activation email in your inbox and click the link within to activate your RefWorks account. You’ll be directed, the next time you log in, to fill out your profile (name, department, role) and watch a few tutorials, should you choose. Now you’re set up!
Step 2 – Adding Sources and Making Citations
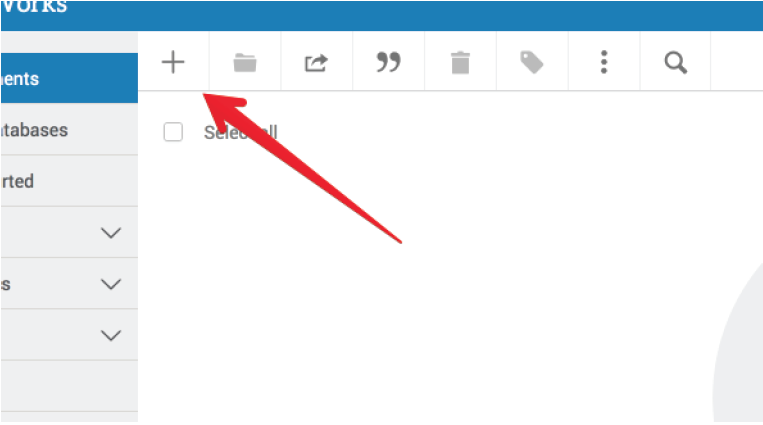
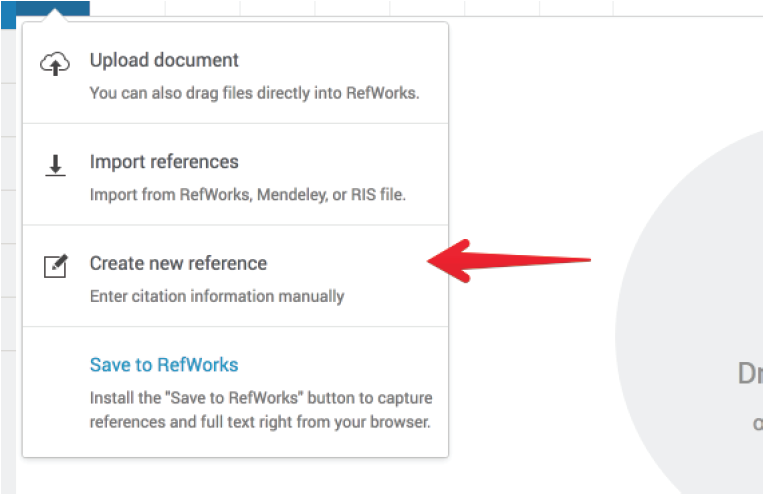
There are several ways to add sources to RefWorks, but the most flexible way is to use the “Plus” icon in the upper left-hand corner and enter in the resource information manually.
When you click the icon, select “Create New Reference.”
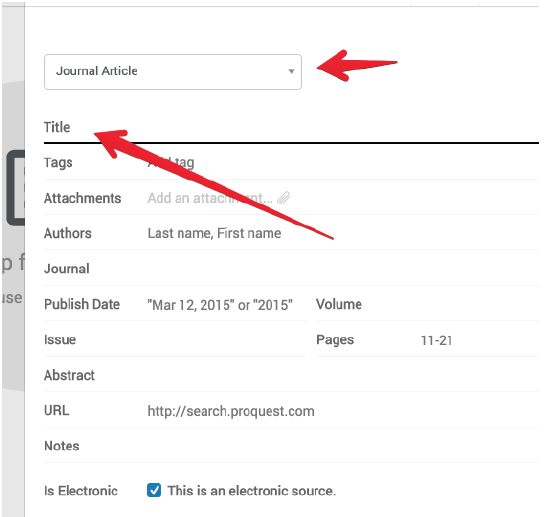
A dialogue window will open where you can enter the source’s information, such as its type (book, article, etc.) and its title.
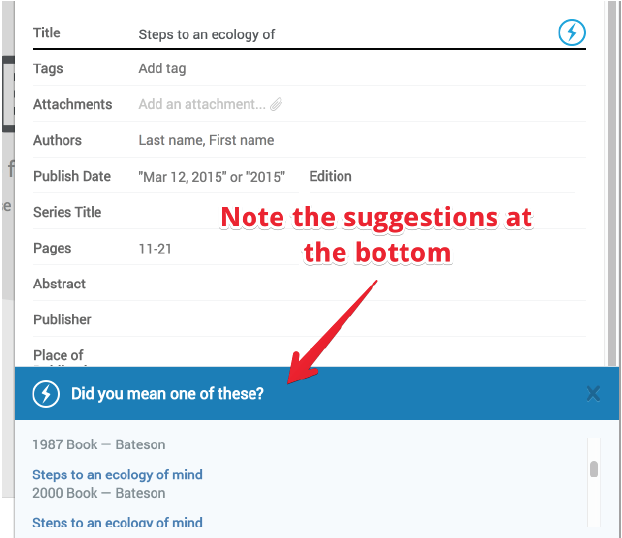
When entering the source’s title, watch the bottom of the dialogue window for matches. Chances are good that the source you’re citing is already in the RefWorks database, and when you click it all the fields will autocomplete for you!
After you fill out the source’s information (or choose one of the suggested sources) click “Save” in the upper right-hand corner of the dialogue window. You’ll see the source you just added appear among your list of documents. You can add as many sources as you like this way.
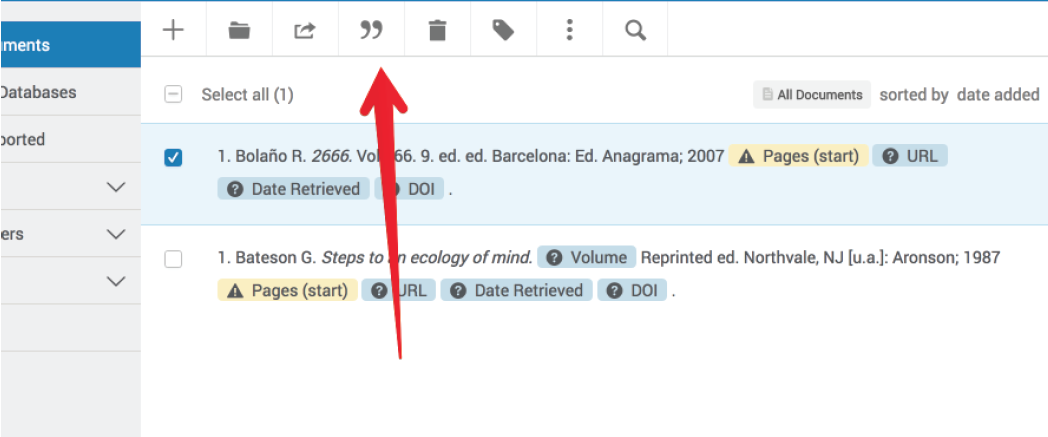
Note the yellow fields in each of the entries listed below; these are marking fields that may be required but that RefWorks does not know how to complete. In this case, it is drawing our attention to the fact that we have books listed, but we haven’t indicated the pages used from those books. Clicking any field in the citation brings up the dialogue window that allows us to complete it.
It is important to remember that the citations RefWorks creates might not be perfect. Never assume that they are fine the way they are; always double-check.
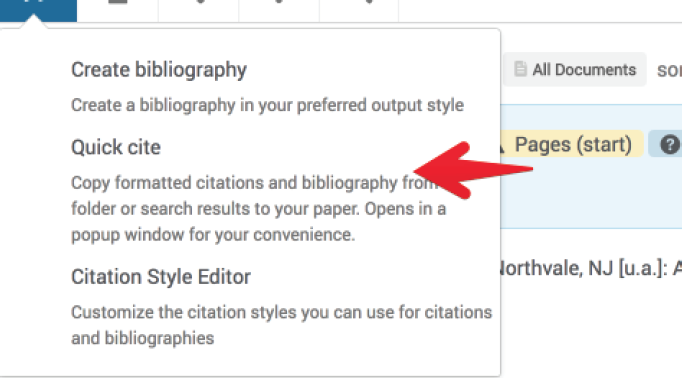
Once you’ve finished adding all the sources you need for your particular project, and double-checking that they are complete, locate and click the “Quote” icon at the top of the “All Documents” page.
Select “Quick Cite” in the dropdown menu that appears.
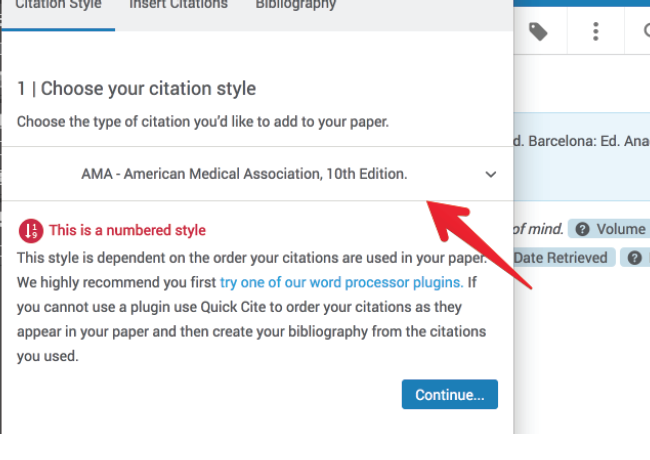
“Quick Cite” will open up a dialogue window that will lead you through the process of making the correct in-text citations, and then even produce a bibliography for all the sources you have listed! You can then copy the bibliography and paste it into your manuscript!
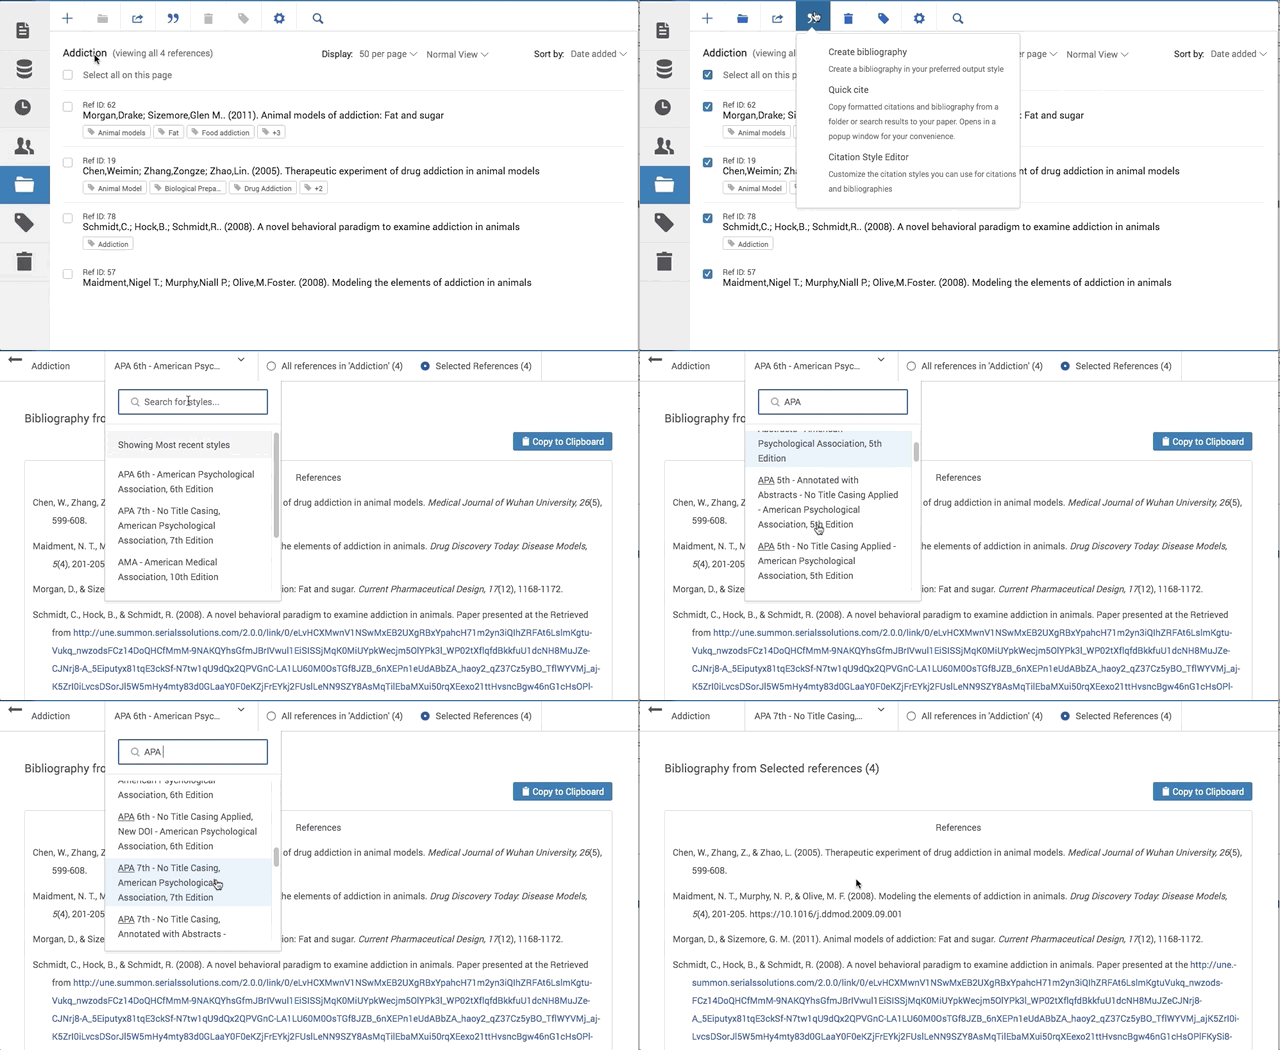
Make sure the correct style is selected in the dropdown before clicking “Continue.”
By default, this section displays your recent choices.
To add new ones (APA 7th Edition, for instance) type it in the search space.
Then follow the guidelines for making in-text citations (they may be different depending on the style). Then click “Continue to Bibliography.”
And finally, after checking to make sure that the bibliography looks right and matches up with the in-text citations you’ve made, click “Copy to Clipboard.” You can now paste the bibliography into the document where you’re writing your paper!
