Step 2 – Uploading Your Video
As your first choice, please use Brightspace’s Video Note Tool to record your video directly in Brightspace or to upload a prerecorded video.
IMPORTANT: In your courses, it is often required that you publish your video as “unlisted.” An unlisted video is not visible to search engines but can be viewed by anyone with the link to the video. Sometimes, you may have to keep your video private and only share with a handful of users who need to review it.
Disclaimer: We make every attempt to keep this content and directions current; however, the interface often changes as upgrades are made. For most up-to-date information, please go to Google’s own YouTube help section on uploading videos.
<<< Back to How to record your video
<<<Back to Recording a Presentation
Making “Unlisted” Your Default Visibility Setting
To make “unlisted” your default upload setting, do the following (you must already have a YouTube channel set up for your UNE account):
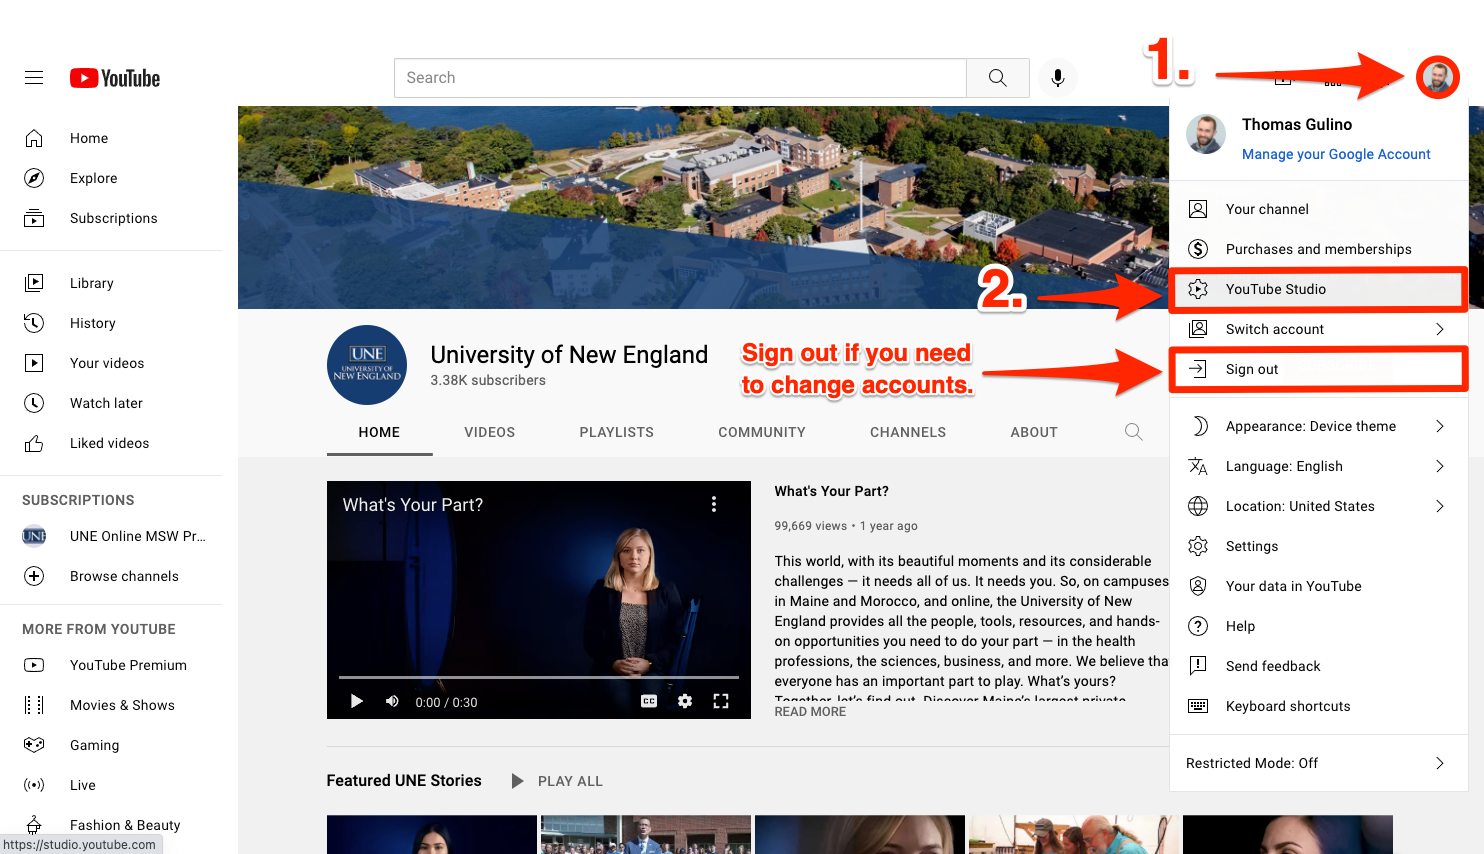
- From the YouTube homepage, click the circle in the upper right corner to access your profile menu.
- Note: Ensure you are signed in using your University of New England email address ending in “@une.edu.” If you are not, you can sign out and re-sign in using the profile dropdown menu.
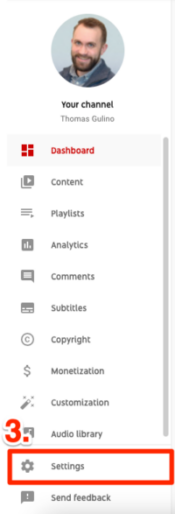
- From the dropdown menu, choose “YouTube Studio.”
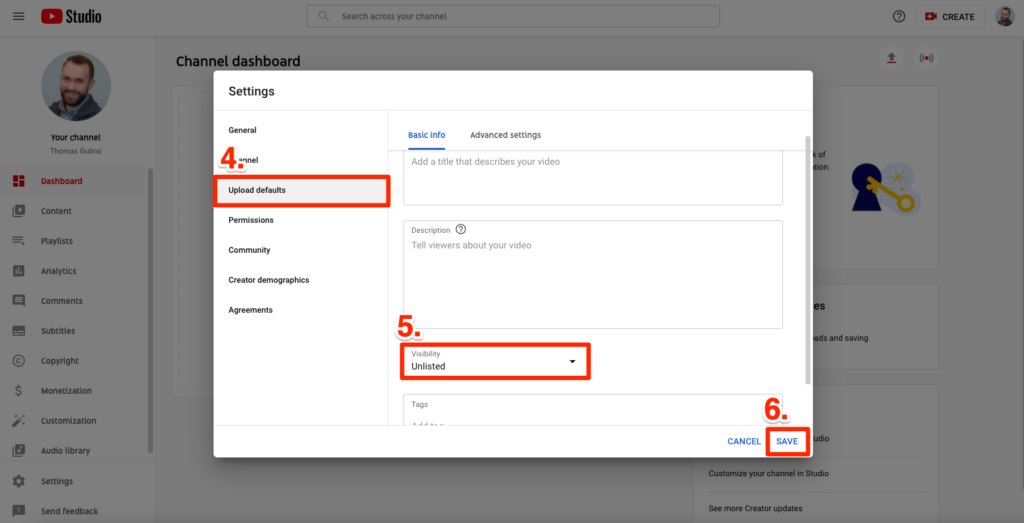
- On the left of the next pop-up screen, choose “Upload defaults.”
- Click the dropdown menu titled “Visibility” and choose “Unlisted.”
- Click “Save.”
Upload a New Video
Reminder: Make sure you are logged into YouTube using your UNE account.
- Navigate to YouTube Studio. (See Steps 1 and 2 above.)
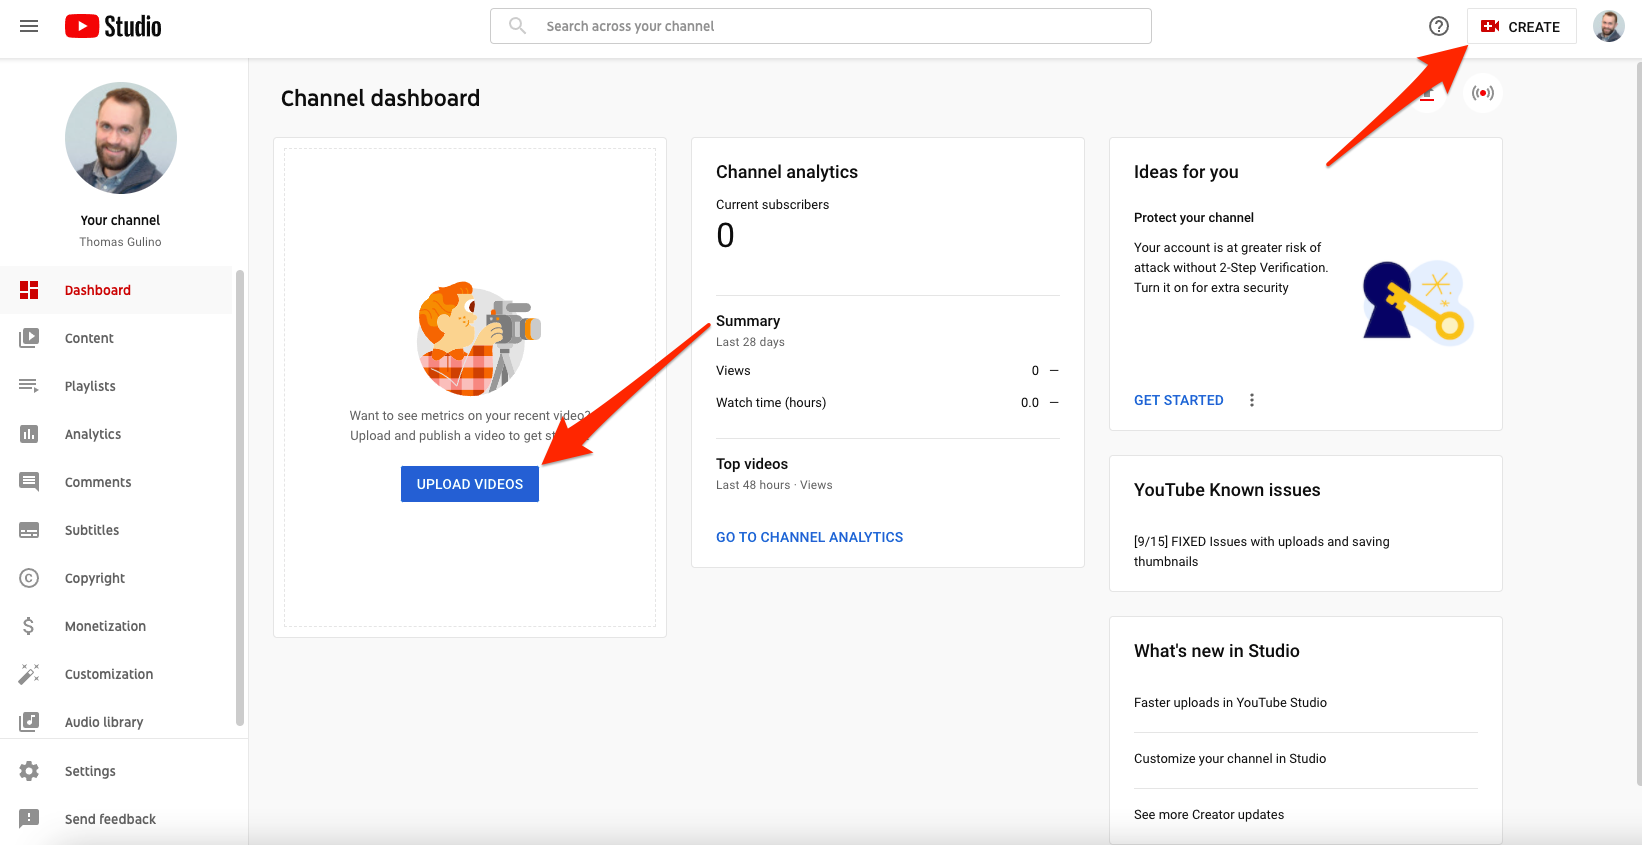
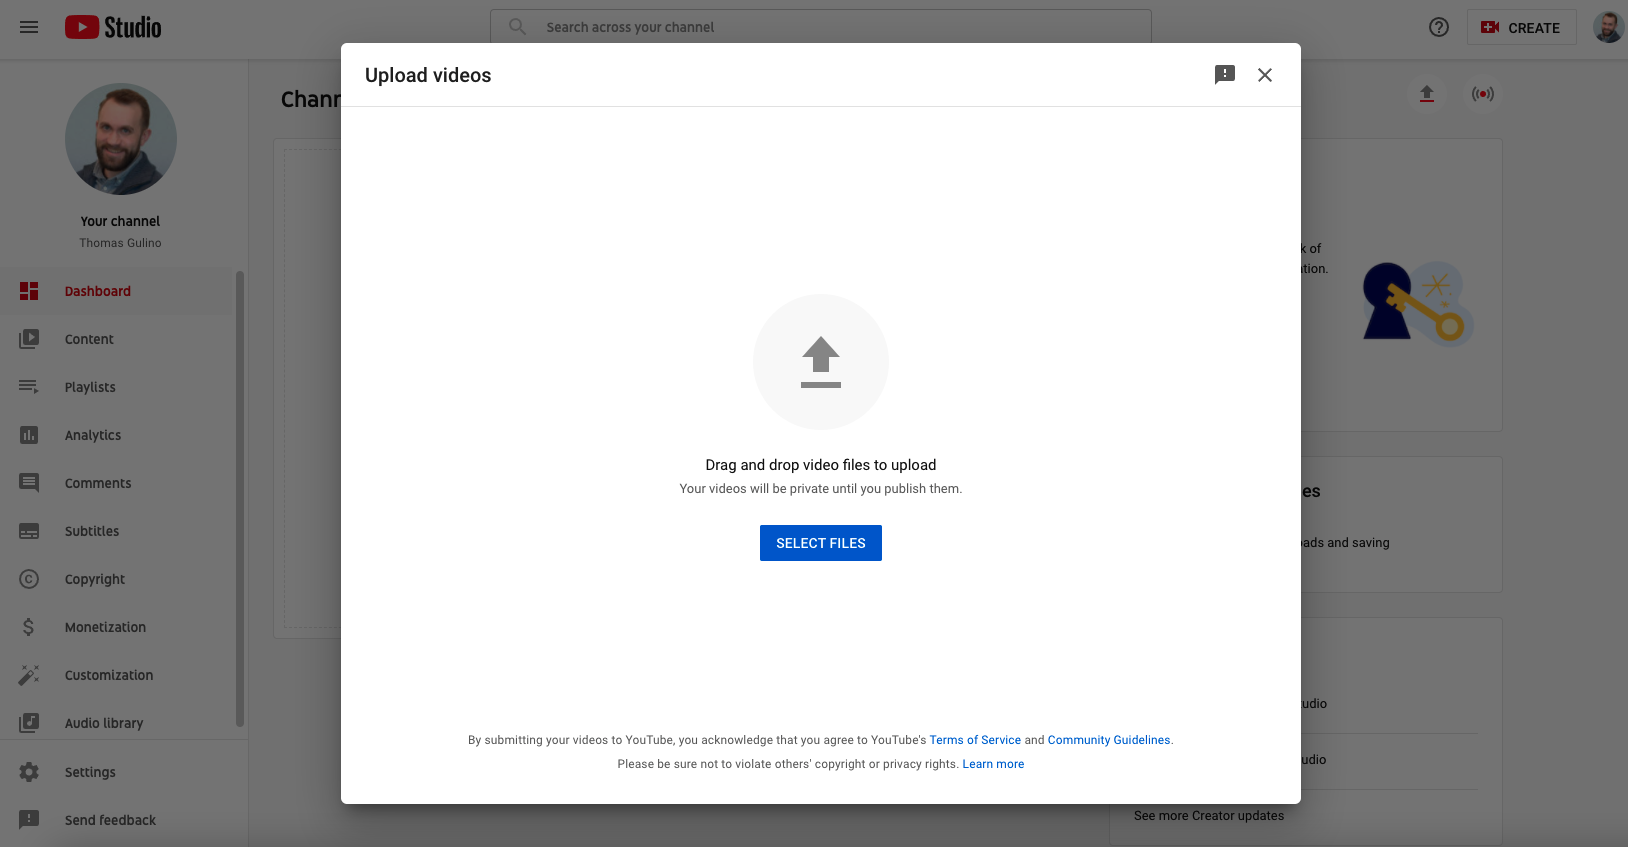
- From the Studio home page click either
- the “CREATE” button in the upper right.
- the “UPLOAD VIDEOS” button in the channel dashboard.
- On the next page, you my drag and drop a video file into the pop-up window.
- Alternatively, click “Select Files” to choose a video from your computer’s file finder.
- Note: .mp4 is the preferred file format for YouTube. While some other formats (like .mov) will work, .mp4 will upload significantly faster.
- After dragging and dropping your video file, the file will begin uploading to YouTube. You will then click through several settings screens while uploading finishes:
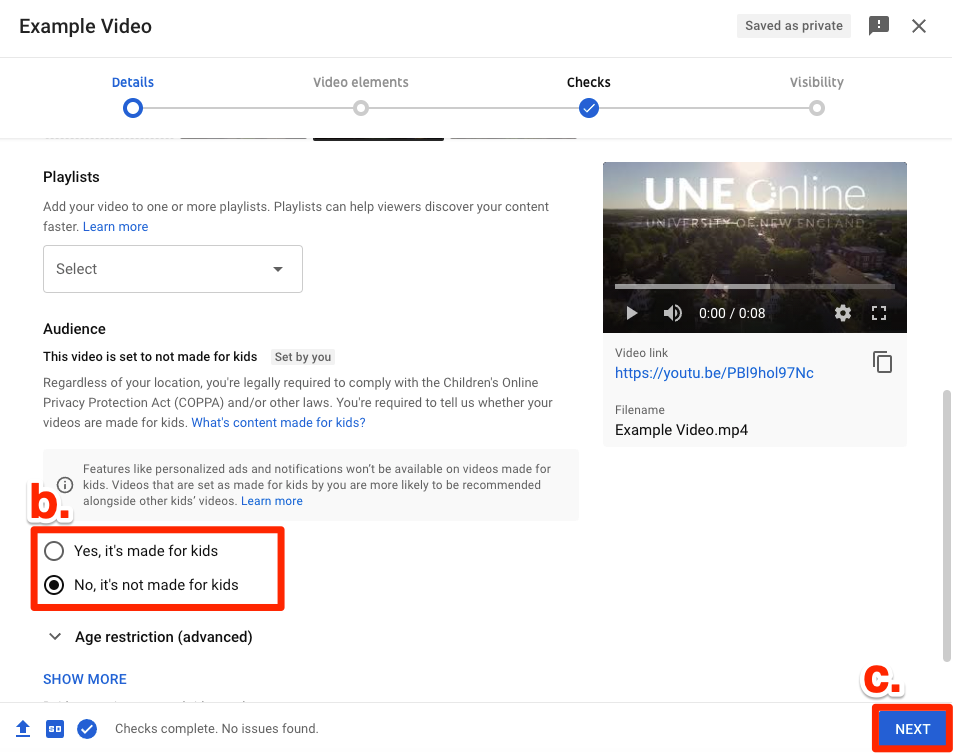
- The first settings page prompts you to enter a title and description. You may leave the description blank if desired.
- Scroll Down on the first settings page to answer the question about intended audience.
- Click “Next” when finished.
- The Video elements page (not pictured here) gives the option to add elements, like subtitles. It can be bypassed for now.
- The Checks page will search your video for copyright issues.
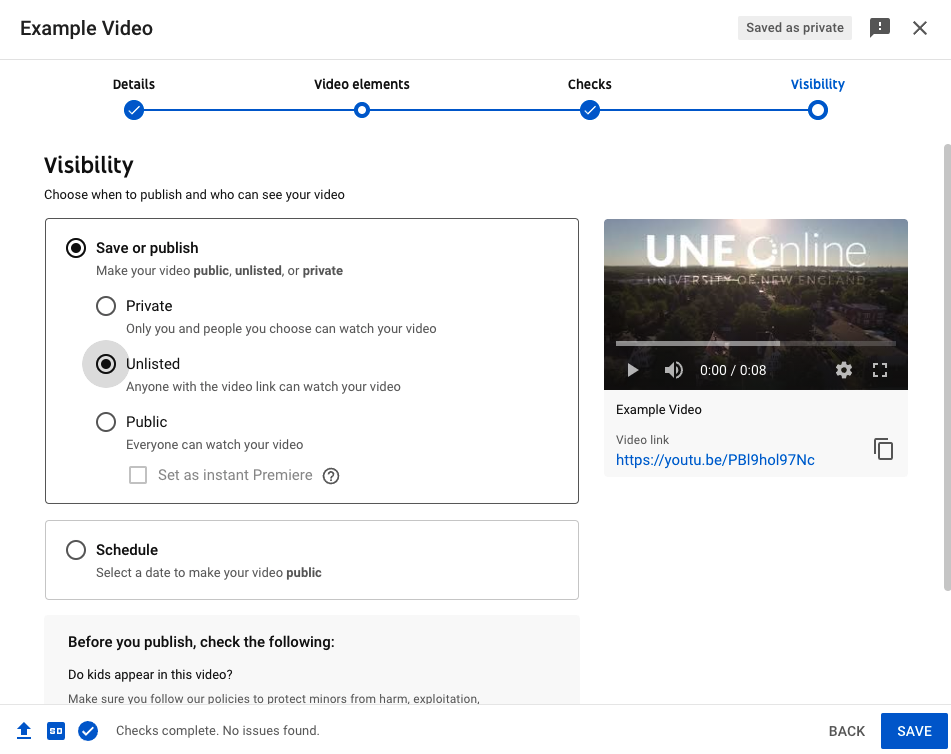
- On fourth settings screen, titled “Visibility,” you can select “Unlisted” or “Private” as appropriate. Click “Save” when finished.
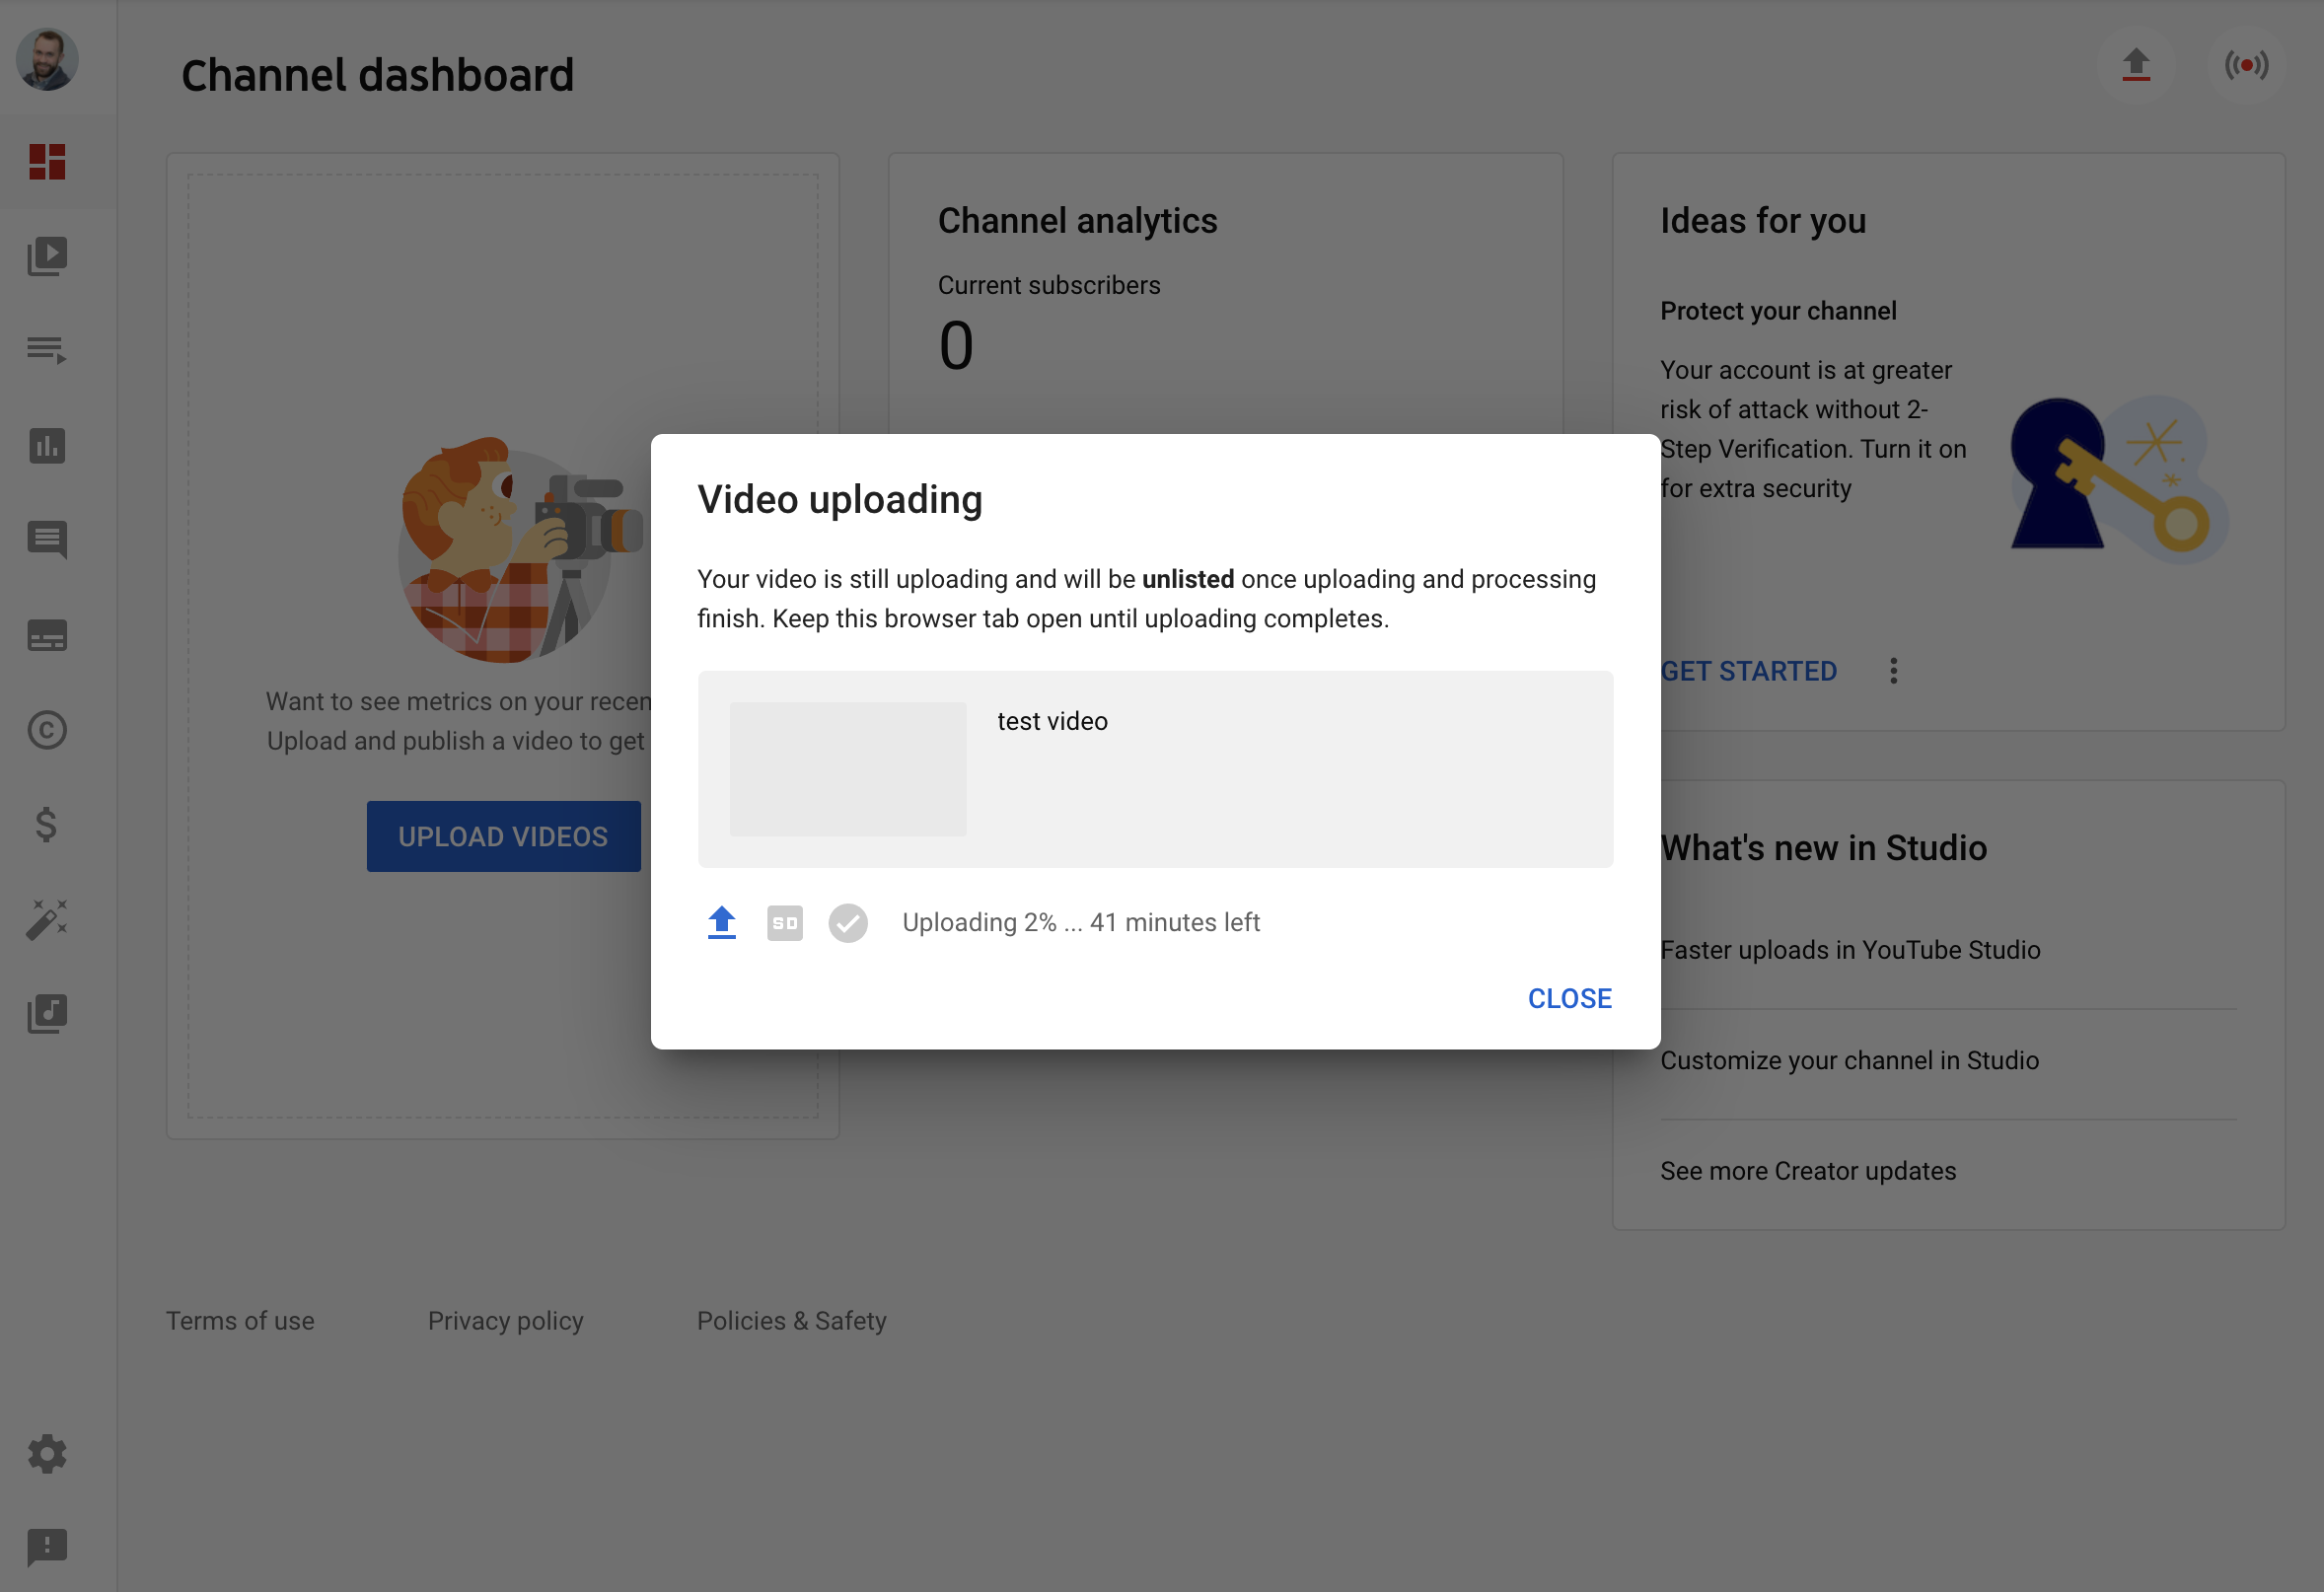
- If your video is still uploading once you’ve completed the settings pages, you’ll be prompted to keep you browser tab open.
- Important: If you navigate away from the browser tab, your video will fail to upload and you must repeat the process.
Disclaimer: We make every attempt to keep this content and directions current; however, the interface often changes as upgrades are made. For most up-to-date information, please go to Google’s own YouTube help section on uploading videos.
